
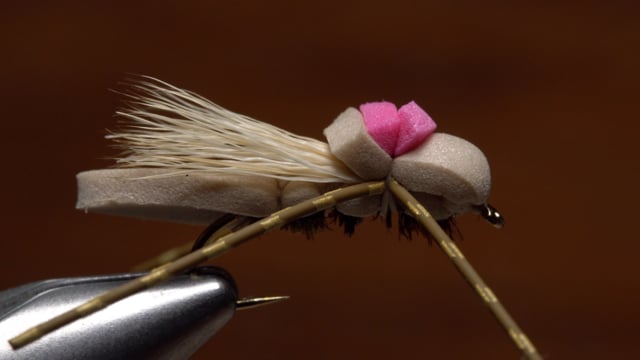
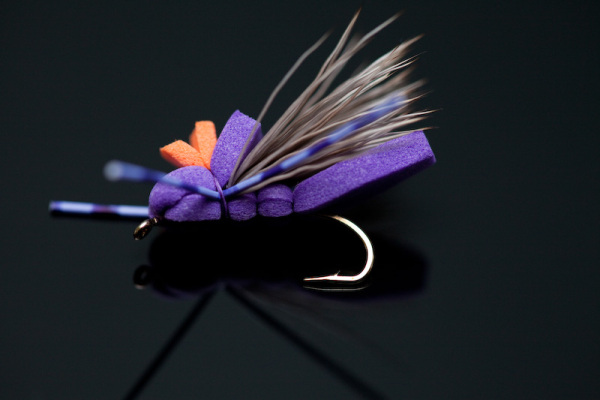
GFA Hopper
- Posted on:
- Author: Julian Tapping
- Categories: Fly of the Month, The Fly Box
- Tags: fly tying, GFA hopper, hopper
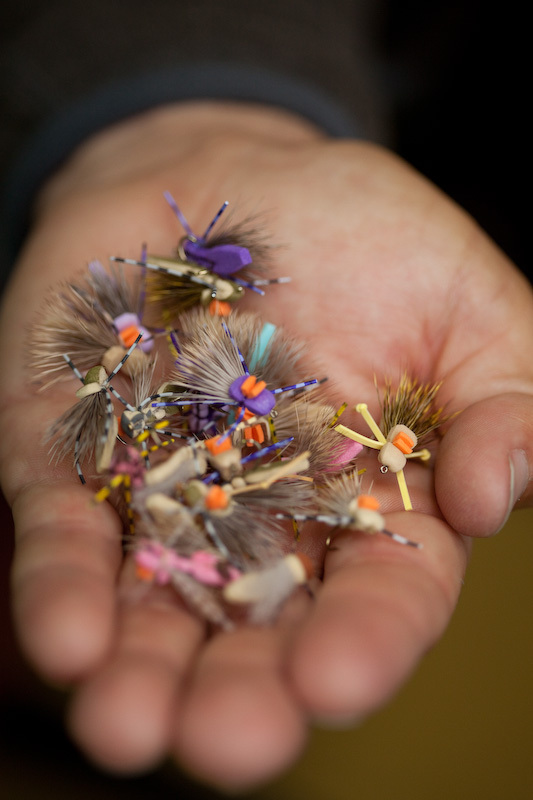
GFA stands for “General Foam Attractor”. The GFA Hopper pattern was created by Walter Wiese out of Parks Fly Shop in Gardiner, Montana. This pattern is easy to tie and looks and fishes well in all colours.
Materials
- Hook: Dai Riki 280, size 6-14. The Dai Riki 280 is a specific Hopper Hook that is 2x long with a curved shank.
- Thread: UTC 70 denier for size 14, UTC 140 denier size 8-12.
- Body: 2mm craft foam.
- Wings: Deer Hair.
- Legs: Medium-sized rubber legs, barred.
- Post: 2mm craft foam, any bright colour such as yellow, white or orange.
Instructions
What follows is tying instructions for the Purple GFA Foam Hopper, from Hopper Fishing, but can be tied with any colour.
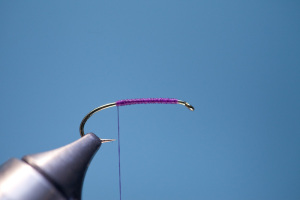
Step 1
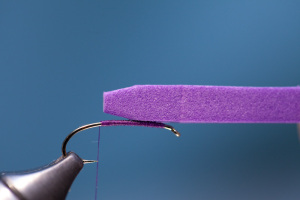
Wrap a tread base to point of hook. I usually wrap a 3-5 layer thread base which seems to keep the hopper body from twisting on the hook.
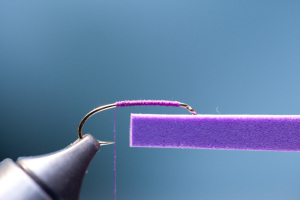
Step 2
Cut a strip of 2mm craft foam. Strip of foam should be width of gap of hook and 2 inches long.
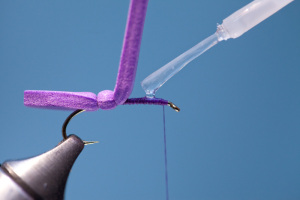
Step 3
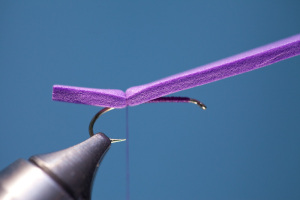
Trim end of foam strip to a taper. Next, place foam strip on top of hook as shown above and mark the foam with your fingernail just beyond the hook eye.
Step 4
Place the foam strip on top of hook. Next, line up the thumbnail mark in foam with the point of hook. Bind down foam with 5-6 firm wraps of foam.
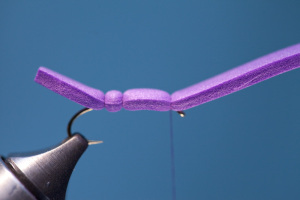
Step 5
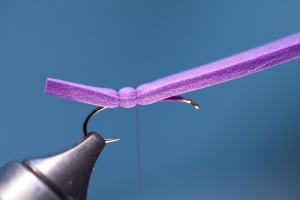
Advance thread forward, on hook only, about a quarter of the way to eye of hook. Bind down foam with 5-6 firm wraps of thread.
Step 6
Advance tread, on hook only, to eye of hook.
Step 7
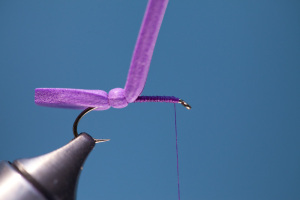
Apply some super-glue to thread wraps as shown.
Step 8
Bind down foam strip with 4-5 firm thread wraps just behind eye of hook.
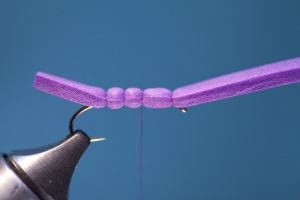
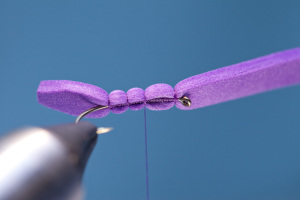
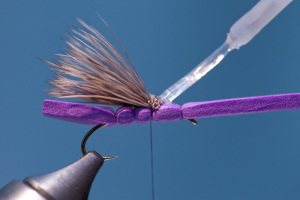
Step 9
Advance thread back over foam body to middle of hook eye and point of hook as shown above. Bind down foam with two firm wraps of thread. Notice the three body segments. The front segment should be a little bigger than the other two segments. Keep thread wraps to a minimum here since the rest of the steps will be tied in here.
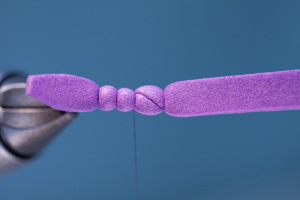
Step 10
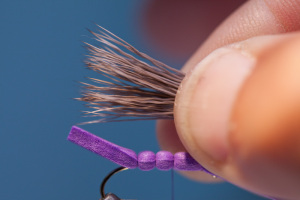
Tie in stacked deer hair with 4-5 firm wraps of thread. The tips of hair should extend to tapered end of foam body.
Step 11
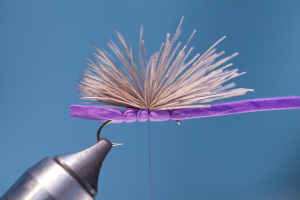
Trim butts of deer hair.
Step 12
Apply super-glue to butts of trimmed deer hair as shown above.
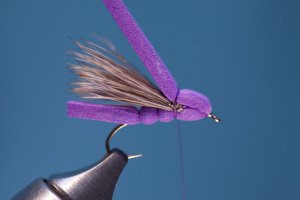
Step 13
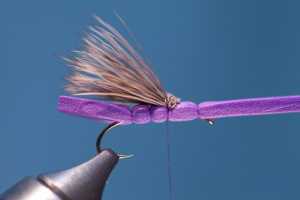
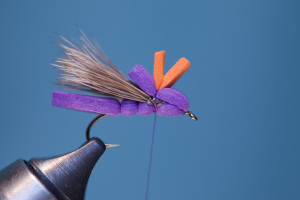
Form bullet head of hopper. Pull strip of foam extending over eye of hook back, and bind down with 2 firm wraps of thread.
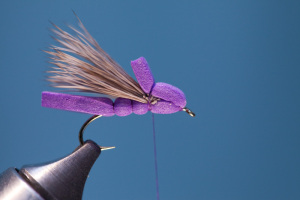
Step 14
Trim remaining strip of foam to desired length.
Step 15
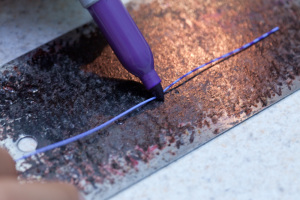
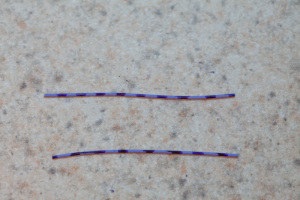
Barr the rubber legs using a Sharpie or other permanent marker.
Step 16
Purple barred rubber legs.
Step 17
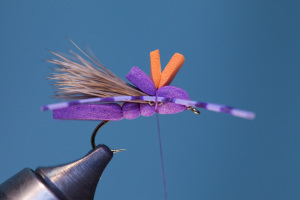
Tie in a foam post. Cut a narrow strip of 2mm orange foam and bind down with two firm wraps of thread.
Step 18
Tie in rubber legs on both sides of hopper body with 3-4 thread wraps.
I usually trim the back legs even with end of tapered body and trim the front legs shorter. For added durability, apply head cement to the thread around the legs.
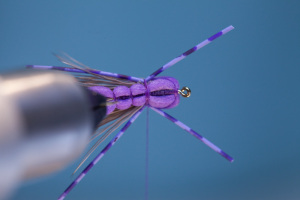
Step 19
After tying in both legs, whip finish fly. Trim legs and post to desired length.
GFA Hopper tying instructions – Tightline Video